
.png)


One conversation, intelligently generate charts, images, and interactive slides
Claim Your Free 7-Day Code
Symbols and icons can transform your slides from plain to powerful. They grab attention, simplify complex ideas, and make your message stick. But let’s be honest—figuring out how to add symbol in google slides can feel like a puzzle. Maybe you’ve struggled to find the right icon or spent too much time resizing it. Don’t worry! With the right tips, you’ll breeze through the process. You’ll save time, reduce frustration, and unlock your creativity to design slides that truly stand out.

Adding symbols directly in Google Slides is simple when you use the Insert menu. Start by clicking on the "Insert" tab at the top of your screen. From the dropdown, select "Special Characters." A pop-up window will appear, giving you access to a wide range of symbols. You can browse through categories like arrows, shapes, or math symbols. Once you find the one you need, click on it, and it will instantly appear on your slide. This method is quick and doesn’t require any additional tools.
If scrolling through endless symbols feels overwhelming, use the search bar in the "Special Characters" window. Type a keyword like "star" or "arrow," and Google Slides will filter the results for you. You can also explore categories using the dropdown menu to narrow your options. This feature saves time and ensures you find the perfect symbol for your presentation.
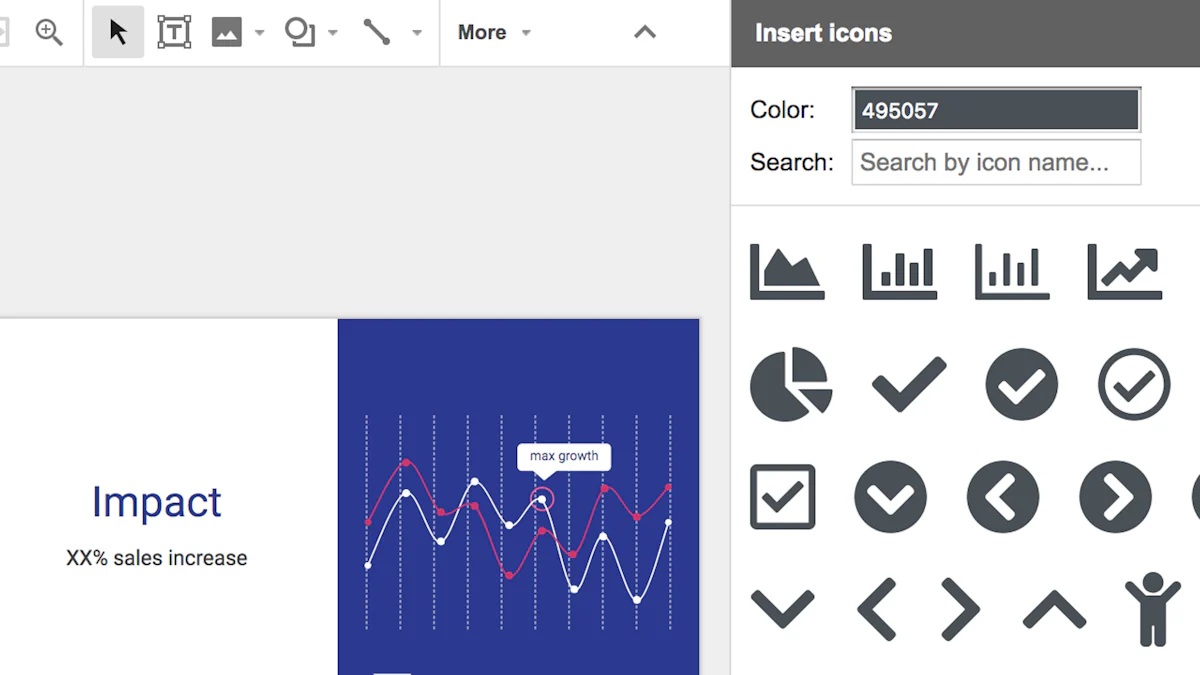
Sometimes, the built-in options aren’t enough. That’s where Google Workspace add-ons come in handy. Popular add-ons like "Icons for Slides & Docs" or "Free Icons by Icons8" offer thousands of high-quality icons. To install one, open your presentation and go to "Extensions" > "Add-ons" > "Get add-ons." Search for the add-on you want, such as Flaticon, and click "Install."
Once installed, find the add-on under the "Add-ons" menu. For example, with Flaticon, go to "Extensions" > "Icons for Slides & Docs" > "Start." A sidebar will appear, letting you search for icons. Click on the one you like, then hit "Insert" to add it to your slide. You can customize the icon by right-clicking and selecting "Format options." This process gives you access to a broader range of visuals, making your slides more dynamic.
If you can’t find the symbol you need in Google Slides, external sources like Unicode or Emojipedia are great alternatives. Visit these websites, search for the symbol you want, and copy it. Then, paste it directly into your slide. It’s a straightforward way to expand your symbol options.
After pasting a symbol, check its formatting. Sometimes, the size or alignment might look off. Use the "Format options" menu to adjust its position, size, or color. This ensures the symbol blends seamlessly with your slide design. Always preview your slide to confirm everything looks polished.
When resizing symbols or icons, keeping their proportions intact is crucial. You don’t want a stretched or squished look ruining your slide. Here’s a quick trick: hold the Shift key while dragging the corner of the symbol. This ensures the proportions stay perfect. If you need more precision, use the Direct Select (A) tool to tweak specific parts of the shape. For consistent alignment, duplicate the resized symbol and use it as a guide to match edges with other elements. Also, check the "scale stroke and effects" option in preferences to resize without altering the symbol’s properties. These techniques make resizing a breeze while keeping your design polished.
Alignment is everything when it comes to professional-looking slides. Make sure your symbols line up with text or other elements to avoid a cluttered appearance. Use the alignment tools in Google Slides to snap symbols into place. For example:
These small adjustments can make your slides look sharp and well-organized.
Matching icon colors to your slide theme is a great way to create harmony in your presentation. Here’s how you can do it:
This simple process ensures your symbols blend seamlessly with your slide design.
Want to make your symbols pop? Add transparency or shadow effects. Right-click the symbol and select Format options. Under "Adjustments," use the transparency slider to make the symbol partially see-through. For shadows, enable the Drop Shadow option and customize its color, angle, and blur radius. These effects add depth and make your slides visually engaging.
Grouping symbols with other elements simplifies your workflow. Select multiple items, right-click, and choose Group. This lets you move or resize them as a single unit. Grouping also maintains alignment and spacing, saving you time during edits. It’s a handy way to keep your design consistent and organized.
Layering symbols can take your creativity to the next level. Stack symbols and elements by adjusting their order. For instance:
Using Layers for Better Symbol Design: Stack symbols creatively to form unique visuals.
Adjusting Layer Order for Better Design: Place key elements on top layers to emphasize importance.
Experiment with layering to create eye-catching designs that stand out.
Keyboard shortcuts can save you tons of time when adding symbols to your slides. Instead of navigating menus, you can use quick key combinations to insert symbols. For example, on Windows, pressing Alt + a numeric code (like Alt + 0176 for the degree symbol °) works wonders. On Mac, try Option + a specific key (like Option + 8 for a bullet point •). These shortcuts are a game-changer when you’re in a hurry.
If you find yourself using the same symbols repeatedly, creating custom shortcuts is a smart move. While Google Slides doesn’t have a built-in feature for this, you can use tools like Google Input Tools or third-party apps like AutoHotkey. These let you assign specific key combinations to your favorite symbols. Imagine typing a simple shortcut and instantly seeing your go-to icon appear—it’s a productivity boost you’ll love.
Why waste time searching for the same symbols over and over? Instead, create a dedicated slide in your presentation to store frequently used symbols. Copy and paste your favorite icons onto this slide. When you need one, just copy it from your library and paste it into your current slide. It’s like having your own toolbox right inside Google Slides.
A messy library can slow you down. Keep your symbol slide organized by grouping icons into categories like "Arrows," "Shapes," or "Emojis." Use text boxes to label each section for quick reference. This simple organization trick ensures you’ll always find what you need without wasting time.
Pre-designed templates are a lifesaver when you’re short on time. Many templates come with built-in symbols and icons, so you don’t have to start from scratch. These templates often include professionally designed layouts that make your slides look polished and cohesive. You can focus on your content while the design work is already done for you.
You don’t have to look far to find great templates. Check out these options:
With so many resources available, you’ll always have access to high-quality templates that elevate your presentations.
PageOn.ai is a cutting-edge AI-powered tool designed to make creating presentations faster and easier. Unlike traditional tools, it focuses on streamlining the entire process, from gathering content to designing slides. Whether you're a student, professional, or educator, PageOn.ai helps you craft visually stunning presentations with minimal effort. It’s like having a personal assistant for your slides!
PageOn.ai stands out with its unique features that simplify presentation creation. Here’s a quick look:
Text-to-PPT Generation
Converts files like PDFs, Word docs, or Markdown into slides in seconds.
AI Image Generation
Creates custom visuals tailored to your content, making your slides more engaging.
Cloud-Based Collaboration
Lets you and your team work on presentations in real time from any device.
These features make PageOn.ai a game-changer for anyone looking to save time and boost creativity.
Getting started with PageOn.ai is simple. Follow these steps:
This process takes the hassle out of creating slides, leaving you more time to focus on your message.
PageOn.ai uses advanced AI to make your presentations stand out. Here’s how:
With these tools, you can create professional-looking slides without breaking a sweat.
PageOn.ai speeds up the presentation process like no other tool. Its AI-driven content generation eliminates the need for manual research and slide design. You’ll have a complete presentation ready in minutes, not hours. Plus, its cloud-based collaboration lets you work with your team in real time, no matter where you are.
PageOn.ai offers unmatched customization options. You can recolor symbols, tweak diagrams, and integrate multimedia elements to align perfectly with your message. The AI-driven design features ensure every slide looks polished and professional. It’s perfect for creating presentations that truly stand out.
Adding symbols and icons to your Google Slides doesn’t have to be a hassle. You’ve learned how to insert them, customize their size and colors, and even group or layer them for unique designs. Remember to keep your slides visually appealing by using a balanced color scheme. Stick to one dominant color, a secondary color, and an accent for harmony. Don’t forget to ensure high contrast for readability.
Pro Tip: Experiment with gradients, shadows, and text elements to make your symbols pop!
Tools like PageOn.ai take your presentations to the next level. Its AI-powered features streamline the process, letting you focus on your message while it handles the design. You’ll save time and create slides that captivate your audience. So, dive in and try these tips and tools. Your next presentation is bound to shine!