How to Set Up Notion Widgets on Mac in 2025
Transform your Mac into a productivity powerhouse with customizable widgets
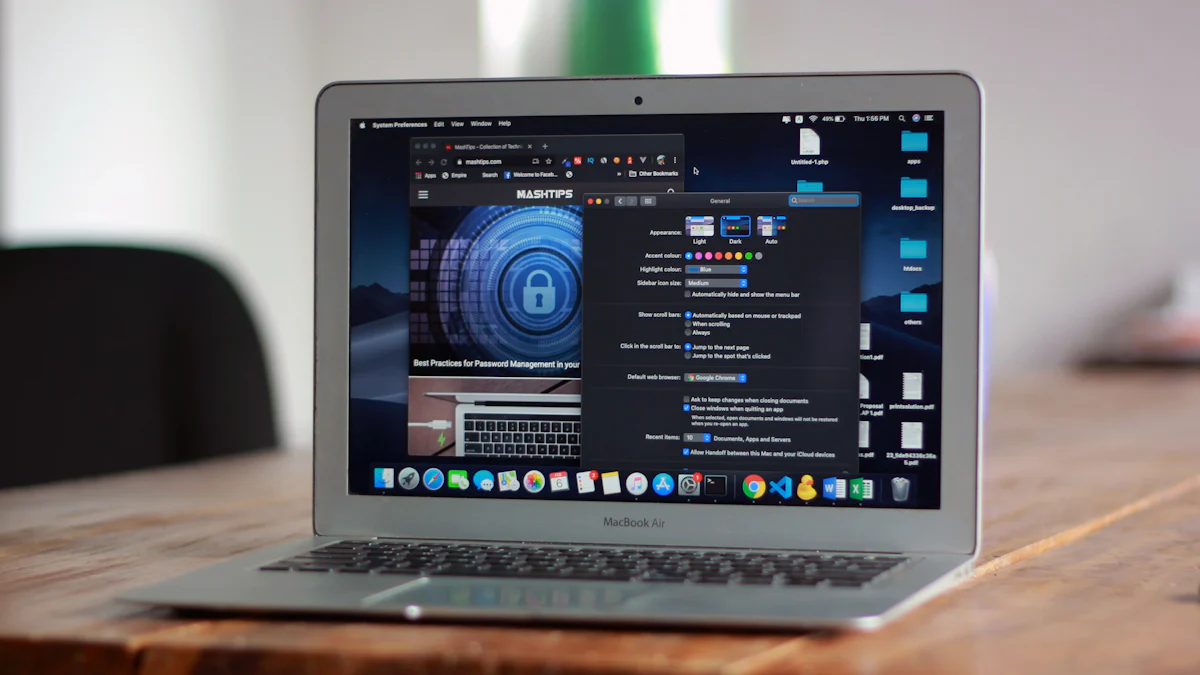
Notion widgets can transform your Mac into a productivity powerhouse. These tools display essential information like tasks, schedules, and more, all in one place. You can customize them to match your workflow, making your workspace truly yours. Widgets also allow you to integrate data from other apps or websites, streamlining your tasks and enhancing functionality. By learning how to set up notion widget on Mac, you can create a seamless system that boosts efficiency and keeps everything organized.
What Are Notion Widgets?
Overview of Notion Widgets
Definition and purpose of Notion widgets
Notion widgets are small, interactive tools that you can add to your Notion workspace. They display essential information or perform specific functions, helping you stay organized and productive. These widgets act as visual aids, offering quick access to data like tasks, schedules, or even motivational quotes. By using them, you can create a workspace tailored to your needs, making it easier to manage your daily activities.
Widgets serve a dual purpose. They enhance functionality by integrating useful features directly into your Notion pages. At the same time, they improve the visual appeal of your workspace. Whether you want to track your habits, monitor deadlines, or simply add a touch of creativity, widgets make it possible.
Examples of popular Notion widgets like calendars, task lists, and habit trackers
You can choose from a wide variety of widgets to suit your preferences. Some of the most popular options include:
Popular Notion Widget Types
Distribution of most commonly used Notion widgets
- Calendar widgets: Keep track of important dates and deadlines.
- To-do list widgets: Manage your tasks interactively.
- Habit tracker widgets: Monitor your progress on daily routines.
- Weather widget: Get real-time weather updates for your location.
- Countdown widgets: Display the time remaining until an event.
- Music player widgets: Stream your favorite songs directly from Notion.
- Quote widgets: Receive daily motivational quotes to stay inspired.
Each widget offers unique features, allowing you to customize your workspace and make it more functional.
Benefits of Using Notion Widgets on Mac
Enhanced productivity and organization
Using Notion widgets on Mac can significantly boost your productivity. These tools keep your most-used information visible at all times, helping you maintain focus. For example, a weather widget can provide instant updates on the forecast, saving you the trouble of checking a separate app. Similarly, a task list widget ensures that your priorities are always in sight, reducing the chances of forgetting important tasks.
Widgets also allow you to tailor the displayed information to your specific needs. You can create a dashboard that includes everything from project deadlines to personal goals. This level of customization helps you stay organized and manage your time more effectively.
Seamless integration with macOS features
Notion widgets integrate seamlessly with macOS, enhancing your overall user experience. You can use third-party apps like Widgetsmith or Widgy to bring your widgets directly to your desktop. This integration allows you to access your Notion data without opening the app, saving time and effort.
For example, you can adjust the size of your weather widget to fit your desktop layout. You can also match its color scheme to your macOS theme for a cohesive look. By keeping your widgets updated, you ensure that the displayed information remains relevant and useful. This seamless connection between Notion and macOS makes managing your tasks and schedules more convenient.
Key Considerations for Setting Up Notion Widgets on Mac
System Requirements and Compatibility
Minimum macOS version required in 2025 (macOS Monterey or later)
Before you begin, ensure your Mac meets the minimum system requirements for running Notion widgets. In 2025, you need macOS Big Sur (11.0) or later to use these widgets effectively. If you're using macOS Sonoma, you're already ahead in terms of compatibility. Older versions may not support the latest features, so updating your operating system is crucial.
Recommended hardware specifications for optimal performance
For a smooth experience, your Mac should have at least 2GB of RAM, though 4GB or more is recommended. An Intel Core 2 Duo processor or newer ensures the widgets run without lag. You also need at least 1GB of free storage space to install and operate Notion widgets. A stable internet connection is essential for syncing data and keeping your widgets updated. Meeting these specifications guarantees optimal performance and prevents potential issues.
Mac System Requirements for Notion Widgets in 2025
Minimum specifications needed for optimal performance
flowchart TD
    A[Mac System Requirements] --> B[Operating System]
    A --> C[Hardware]
    A --> D[Storage]
    A --> E[Internet]

    B --> B1[macOS Big Sur 11.0+]
    B --> B2[macOS Sonoma preferred]

    C --> C1[2GB RAM minimum]
    C --> C2[4GB RAM recommended]
    C --> C3[Intel Core 2 Duo+]

    D --> D1[1GB free storage]

    E --> E1[Stable internet connection]
    E --> E2[Required for sync]
Preparing Your Mac for Notion Widgets
Checking for macOS updates and ensuring compatibility
Start by checking if your Mac is running the latest version of macOS. Open the System Preferences and select "Software Update" to see if an update is available. Keeping your macOS updated ensures compatibility with Notion widgets and enhances security. If you're unsure about your current version, verify it in the "About This Mac" section. Updating your system also provides access to new features that improve your overall experience.
Freeing up storage and optimizing memory for smooth performance
To prepare your Mac, free up storage space by deleting unnecessary files and applications. Use the built-in storage management tool to identify large files or unused apps. Clearing cache files can also help optimize memory. If your Mac feels slow, consider reducing the number of active widgets or simplifying their functions. This step ensures your system runs efficiently, even with multiple widgets in use.
Additionally, ensure your Notion page is public if you're using widgets that require external access. Regularly update your Notion workspace to keep the displayed information relevant. By following these steps, you can create a seamless setup for your widgets and enjoy a hassle-free experience.
Step-by-Step Guide to Adding Notion Widgets to Your Mac Desktop

Installing the Notion Desktop App
Downloading Notion from the official website
To begin, you need to download the Notion desktop app. Visit the official Notion website and choose the version that matches your Mac's processor. If you use macOS Sonoma or a similar version, ensure you select the correct download link. Notion provides options for both Apple Silicon and Intel-based Macs. Using the right version ensures compatibility and prevents installation errors.
If you encounter an error stating, "You can't open the application 'Notion' because this application is not supported on this Mac," it means the downloaded version is incompatible with your processor. Double-check your Mac's specifications and download the correct version.
Installing the app and logging into your Notion account
Once the download is complete, open the installer file and follow the on-screen instructions. Drag the Notion icon into your Applications folder. After installation, launch the app and log in using your Notion account credentials. If you don't have an account, create one by following the prompts. Logging in syncs your workspace and prepares it for widget integration.
Notion Widget Setup Process
Complete workflow from installation to desktop integration
flowchart TD
    A[Start] --> B[Download Notion App]
    B --> C[Install App]
    C --> D[Login to Notion Account]
    D --> E[Access Widget Library]
    E --> F[Select Widget Type]
    F --> G[Customize Widget]
    G --> H[Generate Embed Code]
    H --> I[Use Third-Party App]
    I --> J[Add Widget to Desktop]
    J --> K[Position & Resize]
    K --> L[Sync with Notion]
    L --> M[Complete]
Setting Up Notion Widgets
Accessing the widget library in Notion
To set up widgets, start by accessing your Notion workspace. Open the app and navigate to the page where you want to add widgets. Add a new block by clicking the "+" button or using the keyboard shortcut. Choose the "Embed" option and paste the widget code or integration link. Preview the widget to ensure it displays correctly. Save your changes to finalize the setup.
You can explore widget providers like Indify or WidgetBox to find options that suit your needs. These platforms offer a variety of widgets, including weather widgets, calendars, and task lists. Customize the widget before copying the embed code to ensure it aligns with your preferences.
Adding widgets like calendars, weather, or task lists to your Notion workspace
Adding widgets like a weather widget or a task list enhances your workspace. For example, a weather widget provides real-time updates, helping you plan your day effectively. To add one, generate the embed code from a provider, paste it into the Notion block, and adjust its size and placement. Similarly, you can add calendars or to-do lists to keep track of deadlines and tasks. These widgets make your workspace more functional and visually appealing.
Configuring and Customizing Widgets
Adjusting widget size, layout, and themes
After adding widgets, you can adjust their size and layout to fit your workspace. Click on the widget block and use the resizing handles to modify its dimensions. Arrange widgets logically to create a clean and organized layout. Many widgets also offer theme options. Choose a theme that matches your workspace's aesthetic or your macOS Sonoma color scheme.

Personalizing widget colors and functionality
Personalization helps you make the widgets truly yours. Select colors that align with your style or brand. For example, you can match the weather widget's colors to your desktop background for a cohesive look. Some widgets allow you to tweak their functionality. For instance, you can set a weather widget to display updates for a specific location. Regularly review your widgets to ensure they remain relevant and useful.
Tip: Limit the number of widgets on a single page to maintain fast loading times and avoid clutter. Group related widgets together for better organization.
Adding Widgets to Mac Desktop
Using third-party apps like Widgetsmith or Widgy to add widgets to the desktop
To bring Notion widgets directly to your Mac desktop, you can use reliable third-party apps. These apps allow you to display widgets outside the Notion app, making them accessible at all times. Some of the most popular options include:
- Widgetsmith: Known for its customization options, Widgetsmith lets you design widgets that match your desktop's style.
- Widgy: This app offers advanced features, allowing you to create highly personalized widgets.
- Widgetable: A user-friendly app that provides a variety of pre-designed widgets for quick setup.
- Notion Widget: Specifically designed for Notion users, this app simplifies the process of embedding widgets on your desktop.
To use these apps, download and install your preferred option from the Mac App Store or the developer's website. Once installed, follow the app's instructions to link your Notion workspace. For example, you can generate an embed code for a weather widget in Notion and use the app to display it on your desktop. This method makes it easy to add widgets to mac desktop, enhancing both functionality and convenience.
Syncing Notion widgets with macOS desktop features for seamless integration
Syncing Notion widgets with macOS desktop features can transform your workflow. This integration allows you to access your widgets without opening the Notion app, saving time and effort. For instance, you can pin a task list or calendar widget to your desktop, ensuring your priorities are always visible.
The benefits of syncing include:
- Quick Access: Instantly view your most-used Notion pages, such as a daily agenda or project dashboard.
- Enhanced Productivity: Keeping tasks and notes visible helps you stay focused and organized.
- Customizable Information: Tailor your widgets to display exactly what you need, whether it's a countdown timer or personal notes.
- Visual Appeal: Well-designed widgets can improve your desktop's appearance, making it more enjoyable to use.
To sync your widgets, use macOS tools like the Notification Center or third-party apps mentioned earlier. For example, Widgy allows you to integrate Notion widgets with macOS features like desktop overlays. You can also adjust the widget's size and position to fit your screen layout. Whether you want to add weather to notion or track your tasks, syncing ensures a seamless experience.
By integrating Notion widgets with your Mac desktop, you create a workspace that is both functional and visually appealing. This setup keeps essential information at your fingertips, helping you stay productive throughout the day.
Using PageOn.ai to Create Perfect Presentations
What Is PageOn.ai?
Overview of PageOn.ai as an AI-powered tool for presentations
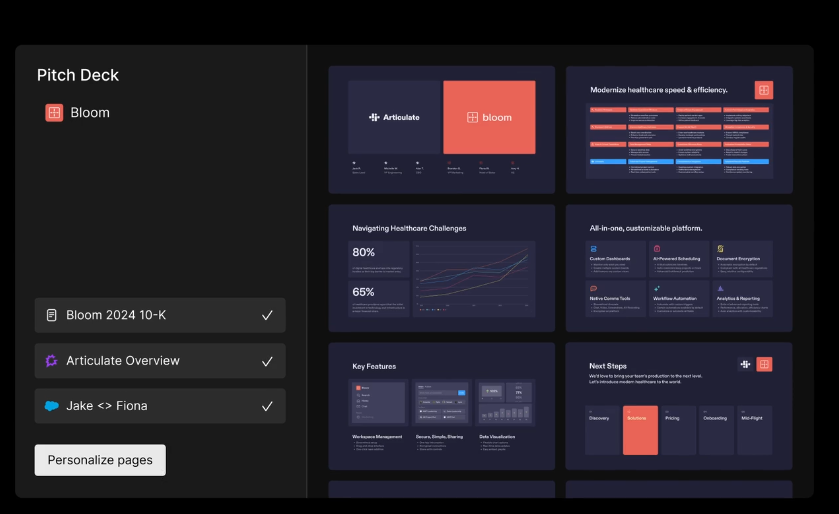
PageOn.ai is an advanced AI-powered platform designed to simplify the process of creating professional presentations. It automates slide generation, allowing you to focus on delivering your message rather than spending hours on design. The platform ensures consistency across slides, enhancing the overall quality of your presentation. With its customizable templates and styles, you can tailor your slides to meet specific needs, whether for business, education, or personal use.
By leveraging AI-driven technology, PageOn.ai helps you craft visually appealing and coherent presentations. This tool eliminates the hassle of manual formatting, making it easier to create impactful slides that resonate with your audience.
Key features: AI search, virtual presentations, and image generation
PageOn.ai offers several standout features that make it a go-to tool for presentation creation:
PageOn.ai Key Features
Comparative analysis of time-saving benefits
- AI-driven storytelling: It generates engaging narratives to keep your audience captivated.
- Automated slide generation: Quickly produce professional designs without starting from scratch.
- Customizable templates: Choose from a variety of styles to suit your presentation's purpose.
- User-friendly interface: Intuitive editing tools make customization straightforward.
- Image generation: Create visuals that align perfectly with your content.
These features work together to streamline the presentation process, saving you time and effort.
How to Use PageOn.ai for Presentations
Searching for PageOn.ai and accessing the platform
To get started, search for PageOn.ai using your preferred browser. Visit the official website and create an account if you're a new user. Once logged in, you'll gain access to the platform's tools and features.

Inputting your ideas, themes, or reference files
Begin by entering your main topic or keywords. This step helps the AI understand your goals and generate relevant content. You can also upload reference files or documents to provide additional context for your presentation.
Reviewing AI-generated outlines and selecting templates
After inputting your ideas, PageOn.ai generates an outline tailored to your needs. Review the suggested structure to ensure it aligns with your vision. Next, browse through the available templates and select one that matches your audience and purpose.
Customizing templates, charts, and images
Personalize your presentation by editing the template. Add text, images, and charts to convey your message effectively. Adjust design elements like fonts, colors, and backgrounds to make your slides unique. Use the platform's intuitive tools to refine every detail.
Saving and sharing your presentation in the cloud or as a PDF
Once satisfied with your presentation, save it to the cloud for easy access. You can also export it as a PDF or other formats for sharing. This flexibility ensures your work is ready for any platform or audience.
Why PageOn.ai Is Recommended
Time-saving and user-friendly features
PageOn.ai simplifies the presentation process, saving you valuable time. Its user-friendly interface ensures that even beginners can create professional slides effortlessly. The platform's AI-driven tools handle the heavy lifting, allowing you to focus on content.
Versatility for both presentations and data analysis
This tool isn't just for presentations. It also includes built-in data analysis features, helping you visualize complex information effectively. Customizable templates keep your slides organized, while the intuitive design tools enhance usability. Whether you're presenting data or telling a story, PageOn.ai adapts to your needs.
With PageOn.ai, you can create polished presentations that leave a lasting impression. Its advanced features and ease of use make it an essential tool for anyone looking to elevate their presentation game.
Troubleshooting Common Issues with Notion Widgets on Mac
Even with proper setup, you might encounter issues with Notion widgets on your Mac. Understanding these problems and their solutions can help you resolve them quickly and keep your workflow uninterrupted.
Common Problems and Solutions
Widgets not syncing with Notion
If your widgets fail to sync with Notion, the issue might stem from connectivity or settings. Start by verifying your internet connection. A slow or unstable connection can disrupt syncing. Check your Notion account status to ensure it is active and functioning. Pending updates in the Notion app or macOS can also cause syncing problems. Update both to the latest versions to avoid compatibility issues.
Clearing your browser data and restarting the browser can resolve temporary glitches. If the problem persists, reset the widget preferences in your Notion workspace. For third-party widgets, contact the provider's support team for additional assistance.
Widgets not displaying correctly on macOS
Widgets may not appear on your desktop or display incorrectly due to macOS settings. Ensure that widgets are enabled in your system preferences. Restart your Mac if the issue continues. If you use a weather widget or similar tools, confirm that your Notion page is public. Private pages can block widgets from displaying properly.
Performance issues can also affect widget functionality. Reduce the number of active widgets if your Mac runs slowly. This step can improve performance and ensure that all widgets display correctly. Additionally, check permissions in your system preferences. Notion needs access to notifications and disk storage for widgets to function seamlessly.
Troubleshooting Decision Tree
Follow this guide to resolve common Notion widget issues
flowchart TD
    A[Widget Issue] --> B{Syncing Problem?}
    B -->|Yes| C[Check Internet]
    B -->|No| D{Display Issue?}

    C --> C1{Internet Working?}
    C1 -->|Yes| C2[Check Notion Status]
    C1 -->|No| C3[Fix Connection]

    C2 --> C4{Notion Working?}
    C4 -->|Yes| C5[Update App]
    C4 -->|No| C6[Wait for Service]

    D --> D1{Widget Visible?}
    D1 -->|No| D2[Check System Preferences]
    D1 -->|Yes, but incorrect| D3[Check Page Privacy]

    D2 --> D4[Enable Widgets]
    D3 --> D5{Page Public?}
    D5 -->|No| D6[Make Page Public]
    D5 -->|Yes| D7[Reinstall Widget]
Tips for Avoiding Issues
Keeping Notion and macOS updated
Regular updates are essential for avoiding technical problems. Keep your Notion app and macOS updated to their latest versions. For macOS users, including those on macos sonoma, updates often include bug fixes and performance improvements. Open the System Preferences and check for updates under "Software Update." Similarly, update the Notion app through its settings menu or the official website.
Updating ensures compatibility between Notion widgets and your operating system. It also provides access to new features that enhance your experience. By staying updated, you can prevent many common issues before they occur.
Clearing cache and restarting the app
Clearing cache files can resolve many temporary glitches. Open your browser or Notion app settings and locate the option to clear cache data. This step removes outdated files that might interfere with widget performance. After clearing the cache, restart the Notion app to refresh its functionality.
Restarting your Mac can also help. It clears system memory and resolves minor software conflicts. If you use a weather widget or other dynamic tools, refreshing the widget app ensures that the displayed information remains accurate. These simple steps can keep your widgets running smoothly and efficiently.
Tip: Regularly review your widget setup to ensure it meets your needs. Remove unused widgets to free up system resources and maintain optimal performance.
Advanced Features and Tips for Notion Widgets

Leveraging Advanced Widget Features
Automating tasks with Notion widgets
Notion widgets can do more than display information—they can automate repetitive tasks, saving you time and effort. For example, you can use a task list widget to automatically update your daily to-do list based on deadlines in your Notion database. Similarly, habit tracker widgets can log your progress without manual input by syncing with other tools like Google Sheets or Apple Health. These automations reduce the need for constant updates, allowing you to focus on more important tasks.
To explore automation further, consider integrating widgets with tools like Zapier. Zapier connects Notion to hundreds of apps, enabling workflows that trigger actions automatically. For instance, you can set up a workflow where adding a new task in Notion updates your calendar widget instantly. By leveraging these features, you can create a dynamic workspace that works for you.

Integrating third-party tools with Notion widgets
Third-party tools expand the functionality of Notion widgets, making them even more versatile. For instance, the HubSpot widget integrates CRM and marketing tools into Notion, keeping you updated on contacts and deals. Similarly, the Metabase widget brings advanced data visualization directly into your workspace, helping you analyze trends without switching apps.
Other tools like Tally allow you to embed forms within Notion, making it easy to collect data such as email signups or survey responses. You can also explore platforms like Apption, which offers over 90 widget options, or Indify, known for its customizable Google Calendar widget. These integrations enhance your Notion experience, turning it into a powerful productivity hub.
Tip: Use Widgetbox or Actions to create custom widgets tailored to your needs. For productivity tracking, Kairo offers excellent options, while Notion Quotes adds a motivational touch to your workspace.
Tips for Maximizing Productivity
Organizing widgets for quick access
Organizing your widgets effectively ensures you can access important information quickly. Start by prioritizing widgets for essential apps or tasks. Place these at the top of your screen for easy visibility. Use Smart Stacks to combine multiple widgets into one space-saving block. This feature allows you to swipe through different widgets without cluttering your desktop.
To add widgets, open the Notification Center by clicking the date and time in the upper-right corner of your screen. Then, select "Edit Widgets" to customize your setup.
Tailor each widget to display relevant information. For example, set your calendar widget to show only upcoming deadlines or your weather widget to focus on your current location. These adjustments ensure your widgets provide the most useful data at a glance.
Using keyboard shortcuts for faster navigation
Keyboard shortcuts can significantly speed up your workflow when using Notion widgets. For instance, pressing "Cmd + K" opens the search bar, allowing you to locate widgets or pages instantly. You can also use "Cmd + Shift + Arrow Keys" to navigate between widgets on your desktop. These shortcuts eliminate the need for excessive clicking, saving you time.
Additionally, some third-party apps like Widgy offer customizable shortcuts for managing widgets. You can assign specific keys to open, close, or refresh widgets directly from your keyboard. By mastering these shortcuts, you can streamline your navigation and boost productivity.
Tip: Keep a cheat sheet of your most-used shortcuts nearby until you memorize them. This small step can make a big difference in your efficiency.
Setting up Notion widgets on your Mac in 2025 offers a straightforward way to enhance productivity. By following this guide, you can input your Notion link, customize widget appearance, and place them on your desktop for easy access. Adjust widget sizes, match colors to your theme, and use icons for better organization. Regular updates ensure relevant information. Tools like PageOn.ai further optimize your workflow by saving time, improving content quality, and automating slide creation. These features help you streamline tasks and maintain focus, making your workspace more efficient.
You Might Also Like
From Boardroom to Brilliance: Master Real Story Techniques for Corporate Speakers
Discover powerful real story techniques for corporate speakers that increase memorability by 22x. Learn authentic storytelling methods, visualization strategies, and delivery techniques for business impact.
Mastering the American Accent: Essential Features for Global Professional Success
Discover key American accent features for global professionals with visual guides to vowel pronunciation, rhythm patterns, and industry-specific applications for career advancement.
Beyond "Today I'm Going to Talk About": Creating Memorable Presentation Openings
Transform your presentation openings from forgettable to captivating. Learn psychological techniques, avoid common pitfalls, and discover high-impact alternatives to the 'Today I'm going to talk about' trap.
Mastering Workplace Communication with International Phonetic Alphabet (IPA) - Visual Guide
Discover how the International Phonetic Alphabet transforms workplace communication. Learn visual approaches to implement IPA for clearer global business interactions.